PREVIOUS PART: THE BASICS
(Images provided by QuakeWiki)
You have an arsenal of nine weapons that form the heart of the game. Each has their own strengths and weaknesses, some more so than others. It's worth getting familiar with all of them - even your starting Machinegun can be a frag winner in practiced hands. Scroll through your weapons with the mouse wheel. If you run out of ammo, you'll automatically switch to the biggest gun you have besides the explosives.
The ammo system in Quake 3 works a little oddly compared to what you might expect. All guns have a maximum ammo count of 200. When you pick up a weapon for the first time, you'll get the gun and its starting amount of ammo. Picking up that same weapon from a weapon spawn point will give you only one more round of ammo if you have the starting ammo or more, otherwise it'll fill you up to the starting ammo amount. However, picking up that same gun after an enemy dies and drops it will add its full starting ammo to your pool, regardless of how much ammo you have for the gun already. It's a little quirky, but just make a note to grab ammo from fallen opponents and ammo boxes around the map and you should be fine.
GAUNTLET
Default hotkey: 1
Damage: 50 + knockback
Rate of fire: 150 rpm
Ammo: Unlimited

The cyan weapon, and one of your two starting weapons. Earlier id Software shooters gave you an unlimited-ammo weapon to use as a last resort, which were typically the weakest ones, dealing less damage than the starting pistol. The Gauntlet follows the tradition of an unlimited-ammo sidearm, but unlike its predecessors, it packs a much bigger punch. Also, each frag dealt with the Gauntlet is followed by a public "Humiliation!" cry from the announcer, which in my opinion is quite worth dropping your bigger guns to clock someone in the face.
Normally you can't switch to the Gauntlet by scrolling the mouse wheel, so pull it out by pressing its hotkey.
MACHINEGUN
Default hotkey: 2
Damage: 5 - 7
Rate of fire: 600 rpm
Ammo: 50 starting, 50 per box

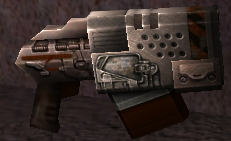
The yellow and second starter weapon. It can score a few frags but you should still look for a bigger gun. The bullets hit instantly, so you don't need to predict your target's location as much as with other weapons.
SHOTGUN
Default hotkey: 3
Damage: 10 per pellet
Rate of fire: 60 rpm, 11 pellets each
Ammo: 10 starting, 10 per box

The orange weapon. Shotguns fire a random spray of 11 pellets that hit instantly but get more inaccurate the further they fly. While it's a short-range gun, it's not just an ammo-burning melee weapon - the key element is being close enough to the target, not as close as possible. The Shotgun can do 110 damage if all 11 pellets connect, which can take down an unarmored foe with 10 damage to spare. It's a very forgiving gun, even if follow-up shots are slow in coming. I find the Shotgun is best when finishing off a weakened target - after they take a shot or two from the Railgun or Rocket Launcher, all it takes is a few pellets from the Shotgun to finish them off.
GRENADE LAUNCHER
Default hotkey: 4
Damage: 100 + splash damage
Rate of fire: 75 rpm
Ammo: 10 starting, 5 per box
One of two green weapons. Grenades are bouncy, gravity-bound explosive projectiles that detonate either on contact with a target or after a couple seconds. I don't recommend this gun except as a last resort because it's tricky to hit with, but it's got enough power to take out an unarmored foe in one hit. The splash damage can be used to knock people around, including yourself - try grenade jumping! You can shoot rockets at the grenades to detonate them too, which results in even bigger boosts. You do take damage from your own grenades, though, so take care not to blow yourself up.
ROCKET LAUNCHER
Default hotkey: 5
Damage: 100 + splash damage
Rate of fire: 75 rpm
Ammo: 10 starting, 5 per box
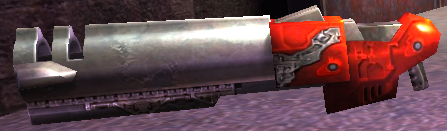
The red weapon. I like the description from Quake 1: "For when a grenade positively, absolutely, has to be there on time."
Anyway, the Rocket Launcher works a bit like the Grenade Launcher - it fires projectiles that travel in a straight line, detonating on whatever they hit. Like grenades, the splash can knock people around and you can blow yourself up. Rocket jumping is much easier than grenade jumping though, and in general it's easier to hit stuff with a rocket than a grenade. Combine this with the same one-hit kill on unarmored targets, and you see why this gun is such a favorite.
If you're going to be using the Rocket Launcher extensively, aim for the floor as opposed to your target - the splash damage will deal damage more reliably than a direct hit. Does it take more time and ammo? Yep. Will it boost your frag count? Absolutely.
Also rockets are quite easy to dodge at long range, so if you're trying to snipe someone, consider switching to a different gun.
LIGHTNING GUN
Default hotkey: 6
Damage: 8 + knockback
Rate of fire: 1200 rpm
Ammo: 100 starting, 60 per box
The white gun, firing a blue-white beam of energy at your target that hits instantly and drains ammo like crazy. It also pushes your opponent away a slight bit - one of the Quake Live trailers shows a guy pinning another player to the wall and pushing him upwards by sticking him to it with the lightning beam. It emits a hum when held, which can be used to track players down or simply warn you of what you're up against. Also, while the lightning beam hits instantly, moving the beam makes it lag a little bit behind your crosshair onscreen. Remember to point where your target is moving, not where they are, and your aim should improve.
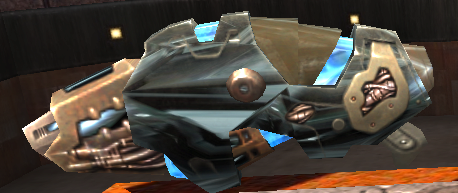
RAILGUN
Default hotkey: 7
Damage: 100 + knockback
Rate of fire: 40 rpm
Ammo: 10 starting, 10 per box
.jpg)
The other green gun, necessitating that you check which of the two green ammo boxes is the right one whenever you look. Railgun ammo boxes are a brighter shade than Grenades, if that helps any. Railguns are the closest the Quake series comes to a sniper rifle. They fire one precision shot capable of downing an unarmored player, followed by the longest reload time in the game. They also have a hefty bit of knockback to them, which is nice for catching someone mid-bounce and dropping them into a bottomless pit. Like the Lightning Gun, they emit a hum when held, which can be used to locate the sniper. Happy hunting!
If you want to hone your Railgun sniping skills, try playing some Instagib matches. Instagib is a game mode where everyone spawns with a Railgun and unlimited ammo, and also everyone goes down in a single shot. It's very fast and frantic, but also the best way to build the muscle memory for pulling off quick, precision shots.
Have some fun with your Railgun too! Quake 3 has two different styles of 'rail trail', a simple straight beam (the default) or a glorious corkscrew shot - and you can customize the colors of each. To swap to the corkscrew, open the command console and enter "cl_oldRail 1" (you can swap back by replacing 1 with 0). Modify the colors using the commands "color X" for the default beam color, "color1 X" for the corkscrew's center beam, and "color2 X" for the corkscrew itself. X can be any number from 1 to 7, relating to blue, green, cyan, red, magenta, yellow, and white respectively.
If you want to fiddle around more, you can find a complete list of console commands here.
PLASMA GUN
Default hotkey: 8
Damage: 20 + splash damage
Rate of fire: 600 rpm
Ammo: 50 starting, 30 per box
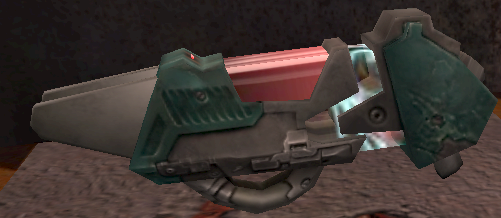
The purple gun which actually glows blue, and my personal favorite. The Plasma Gun fires lots of neon blue projectiles with a small amount of splash damage. The splash is too small to be useful for a rocket jump, but jumping next to a wall and firing into it can boost your jump and slow your fall, similar to a parkour wall-run. The technique is called plasma climbing. Because it fires projectiles, it's tricky to hit with, but offers great damage once you land shots. Try predicting where your opponent will be and shoot there. Also, the neon blue shots can make it harder to see, and it's almost useless at long range.
If you're being pursued and round a sharp corner, a shower of plasma shots can sometimes catch your opponent off guard. Find cover and make use of it. If there's nowhere to hide, it's still a serviceable mid-range weapon and one well worth learning to aim.
BFG10K
Default hotkey: 9
Damage: 100 + splash damage
Rate of fire: 300 rpm
Ammo: 20 starting, 15 per box
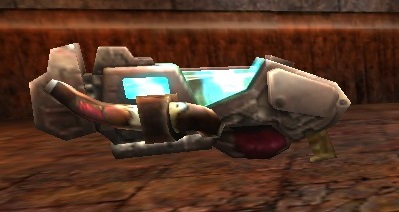
The blue Big [Fat] Gun. This thing is absolutely ludicrous. It packs the punch of a Rocket Launcher at 4 times the firing speed, with more ammo and faster projectiles to boot. Fittingly, it's usually hidden in some sort of deathtrap. Rocket jumping is also possible, and with the boosted rate of fire, you can chain multiple jumps easily. Take care not to get too trigger-happy and blow yourself up with it. If an opponent has it, start hogging all the ammo to make them switch to a smaller gun sooner. Strategy is similar to the Rocket Launcher and Plasma Gun - try predicting your targets' movements and aim for the feet for maximum splash damage. Other than that, go nuts.
My apologies for getting this post out so late! I went back to school and adjusting to classes took more time than I thought. Hopefully I'll get around to finishing this guide soon. In the next update I hope I can cover some basic strategies and movement tips for the game.
NEXT PART: Basic Strategies
No comments:
Post a Comment